Although the above video is for replacing a manual car window, the concept is the same and the video is top be used as reference only. Replacing the door glass on your vehicle will take some time and patience. But if you decide to tackle this job yourself, you can save yourself alot of money at the shop. I am not going to mis-lead you and tell you that changing your cars door glass will be an easy job, because that would be a lie. But since the shop wants upwards of 150.00 to install the door glass, if you are willing to try it, I will help you through the procedure. With all that being said, lets get that door glass replaced.
First things first. Round up the equipment you will need to get started. I always like to have a tarp handy to lay out all the parts and fasteners on, and trust me there will be a-lot of them. You will also need a halfway decent stocked tool kit, as you will be using an assortment of tools. I would give specifics, but each individual car will require different tools, and this tutorial is a general description on replacing your cars door glass, with no particular make or model in mind. So if you are ready, let's get that door glass replaced.
Step 1 - Things you'll need and use: a tarp to help in the cleanup, a variety of common tools, and a repair manual.The tarp will help you keep all the door clips and small parts in 1 place as they are frighteningly easy to lose. And when you go to put the door panel back on, even 1 missing clip will mean the difference in success. | 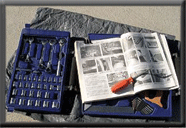 |
Step 2 - Your mileage may vary, but most panels have lots of snaps and screws. Gentle pressure, patience, and a manual will help you peel the panel off the door. And like I said above, do not lose any of the fasteners, you will need everyone of them when you reassemble the door panel | 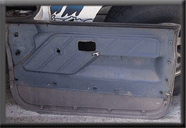 |
You should find a plastic sheet/weather barrier under the panel. Carefully peel this sheet back while avoiding the sticky stuff. You will need to keep the dust and dirt out of the sticky stuff as you will need the adhesive to to reinstall the plastic.
Step 3 - Once you're inside the door panel, gently remove the weatherproofing sheet. Beware the black sticky stuff, it will get on and stick to everything | 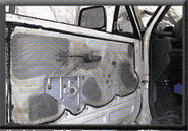 |
Step 4 - With the weatherproofing removed, various access points are revealed. Notice the lift mechanism, bracket and clips. It can be really complicated in there, and there are alot of pinch points so beware of fingers. | 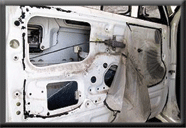 |
Step 5 - The white clip should be supporting a pane of glass. It's not, but it will. | 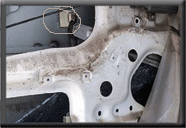 |
Use gloves to remove any hunks of glass that might still be together -window tinting will cause that. Step 6 - Be careful when removing the remnants of the pane.I suggest gloves. This shows how tinted window ends up when broken | 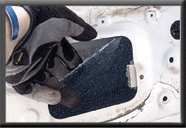 |
Step 7 - Use a shop vacuum to keep things sharp and professional. Take your time to get all the pieces out.You dont want anything rattling around in there that mat drive you crazy later | 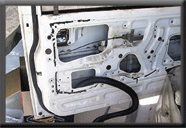 |
Step 8 - The weatherstripping needs to be removed so you can slide the new piece of glass into the door. Another instance where gentle patience will help you keep things nice and unbent. |  |
After you're done with that, wash the replacement glass. Next, take a 2-foot square piece of glass (with a slight bend in it) and fit it into the door through the 2-inch wide slot at the top. Notice how a third or fourth extra hand might be useful. I was stumped at first, but when I stepped back and looked at things, I noticed a couple bolt heads in my door panel. They held a support post for my vent window in place. Once I unbolted them and pushed the post forward, I had enough room to maneuver the glass down into the channel. Success! Follow your manual and you shouldn't have many problems. Remember that glass doesn't like to bend. Find comfort in the fact that the factory got the original piece of glass in there, so you should be able to do it too.
Step 9 - Hard to see in this picture, but there's a solid piece of glass in that slot. It took some relaxing meditation and the epiphany to unbolt one more bolt to get it in. Just relax and know that it happened once, so it can happen again. | 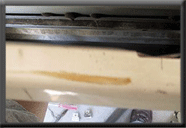 |
The repair manual shows you the placement of the bracket and clips that were bonded to the glass. With the top piece of weatherstripping back in place, make sure the glass is aligned. Does it raise and lower without binding? Great. Snug down the bracket bolts; replace the weatherstripping and barrier sheet. Get the door panel back on and align the window crank lever, if you have one. Mine no longer brushes against my knee when the window is all the way down.
Step 11 - Remove the clips so that you can attach the new glass/clips onto the lifting arm's bracket. Make sure the bolts are snug, but not so tight as to crack the new glass. | 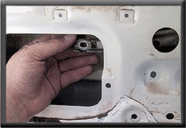 |
Step 12 - Make sure the glass moves smoothly, without any snags. Replace the weatherproofing and reattach the door panel. | 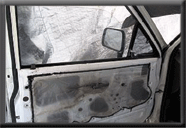 |
Don't forget to visit our blog